Note: The code from this tutorial is based on this tutorial from Ray Wenderlich. This was written in 2014 and was not updated for Swift 2.0, so there are a few changes I have made to my template to make it up to date. I am also writing my own explanations about what each part of this process does. If you just want something that works, you can download to template. If you want something easier to skim, I suggest looking through the Ray Wenderlich tutorial.
Metal was announced at WWDC 2014. It was the most exciting announcement of WWDC for approximately five minutes until Swift was announced.
I was doing a high level Swift talk in 2014 when I didn’t know the framework very well yet and I just wanted to give people an idea about why Metal was important. People were understandably unhappy that I didn’t show them how to code Metal. I am rectifying that mistake.
As was the case when Metal was first announced, you can’t test Metal code in the simulator. You have to build on a device with an A7 chip or later. The most primitive iOS device you can use for this is the iPhone 5S.
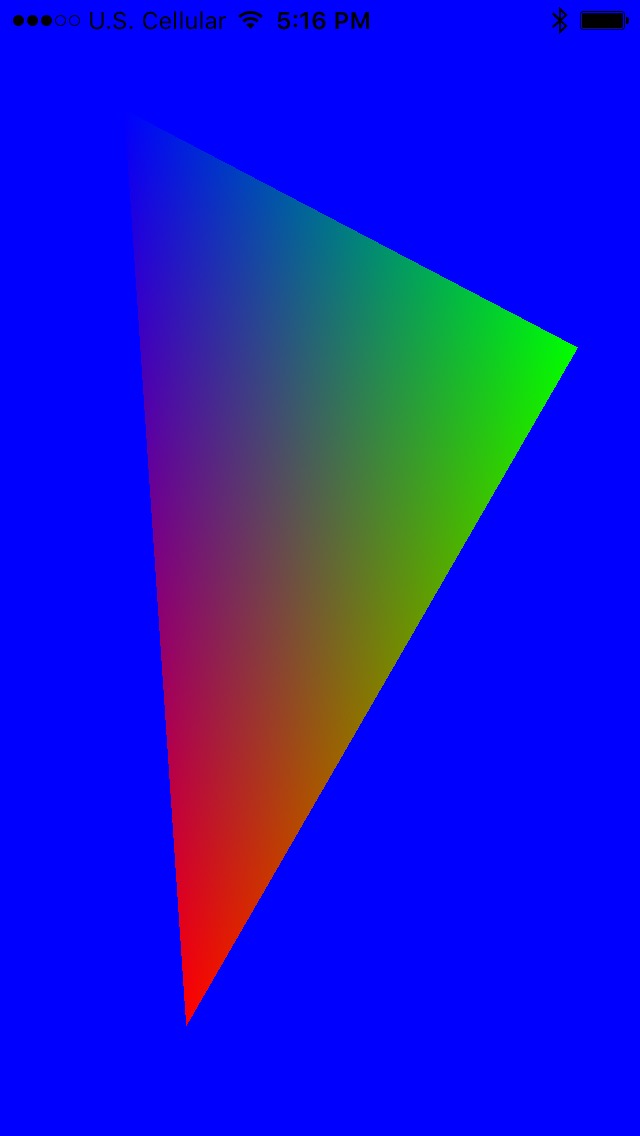
The goal of this project is to create a template that can be used as a base to just get Metal up and running. This doesn’t do anything other than render a color to the screen. I will take this template and add vertex buffers and geometry in a later post to explain how that process works. I didn’t include those in this project because I didn’t want to include anything that would need to be deleted by the programmer before it could be used.
Let’s get started!
Create Project and Import Frameworks
If you want to walk through the process of building the template rather than just downloading it from GitHub, you can follow along with the directions.
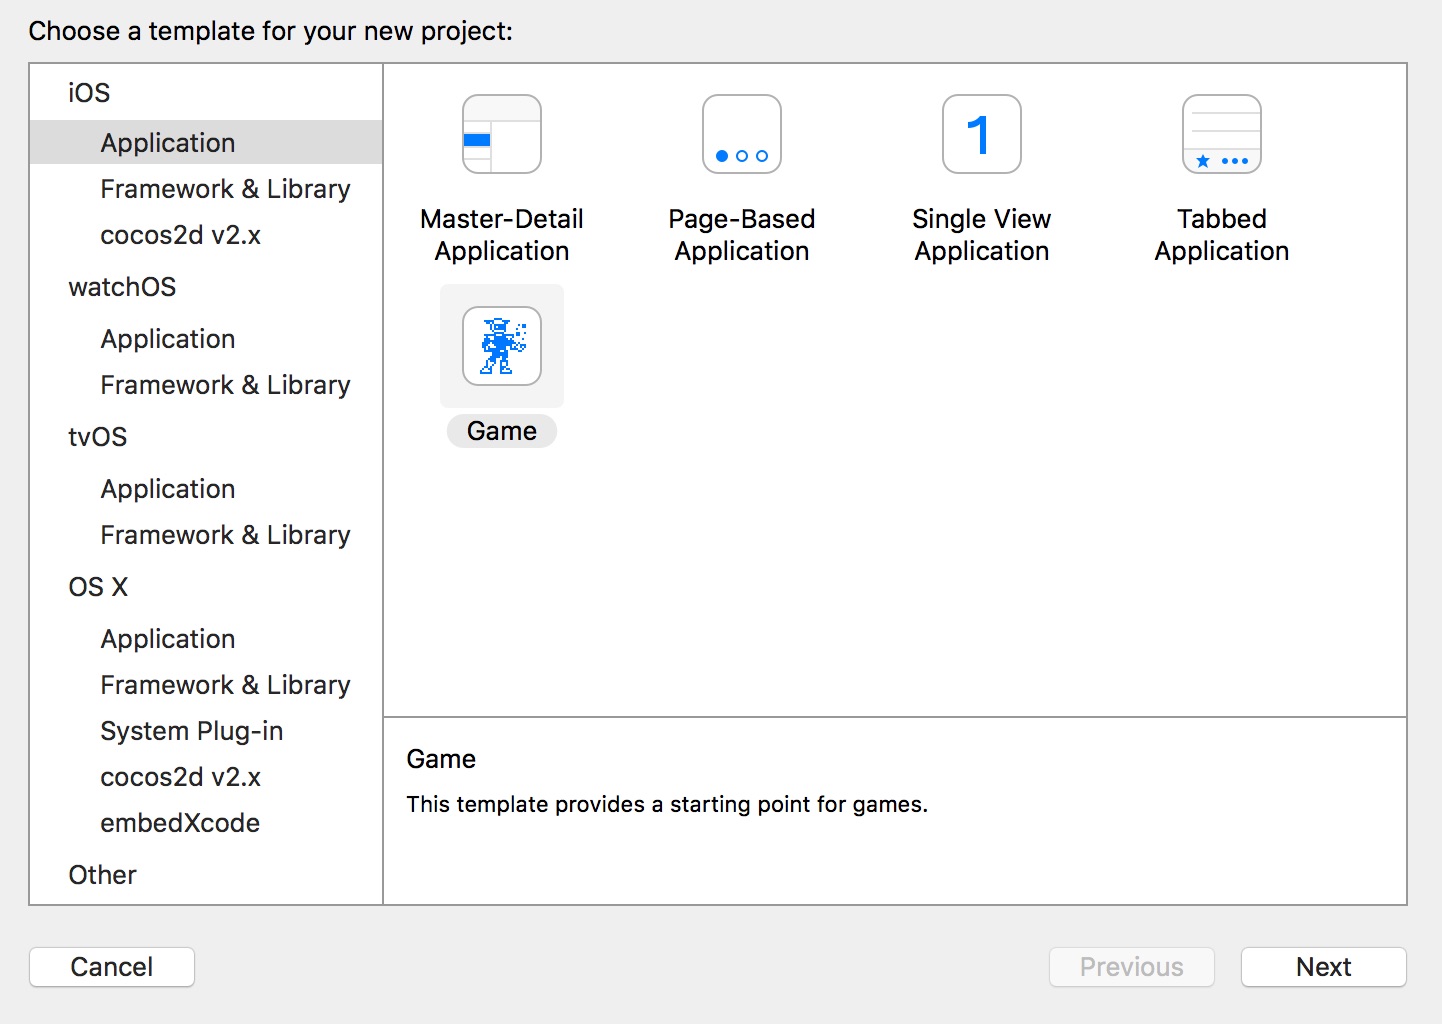
Open Xcode and create a Single View Application. You can name it anything you want. If you are using this as a basis for a project, go ahead and name it whatever it will eventually be. Choose Swift as the language. I made mine Universal, but if you know it will only be on an iPhone, go ahead and just choose iPhone.
There are a few frameworks that you will need to import before you can get Metal up and running.
Add these import statements at the top of your ViewController:
import Metal
import QuartzCore
Metal is obvious. You need to import the framework to do anything with Metal. The QuartzCore is a little less obvious. We’ll get to that soon.
Most of the work we are doing will be in the ViewController class. Unless otherwise specified (as in the Shader code), add all code to the ViewController.
MTLDevice
First thing you need to set up for a Metal project is the MTLDevice. The MTLDevice is the software representation of the GPU. I go over the properties of MTLDevice in a previous blog post. We don’t need access to everything that MTLDevice does for this simple template.
At the top of the ViewController class, add the following property:
// Properties
var device: MTLDevice! = nil
You will be seeing and using the device property a lot in this project. The MTLDevice is the manager of everything going on with your Metal code. You will be instantiating this (and all other properties) in the viewDidLoad() method.
There is only one safe way to initialize your device property:
device = MTLCreateSystemDefaultDevice()
At this point in time, every Metal-capable device only has one GPU. This function returns a reference to that GPU.
CAMetalLayer
Note: You might see an error at some point in this code block that says CAMetalLayer not found. This drove me crazy for a really long time. I downloaded Apple’s template that utilized MetalKit that does not have an instance of CAMetalLayer because it is implemented behind the scenes. I thought it was something that was phased out.
This is an ambiguous compiler error. At some point Xcode switched from saying the build device was a physical device to the simulator. Rather than saying the code won’t build on the simulator, it says the CAMetalLayer was not found.
If you ever get weird, ambiguous compiler errors while coding Metal that say something doesn’t exist, check the build target!
Remember back at the beginning of the blog post where I told you to import QuartzCore? You are importing that for one purpose: To get access to CAMetalLayer.
In iOS, everything you see on your screen is backed by a CALayer. Every view, every button, every cell is backed by a CALayer. CALayer is like the canvas you use to render things to the screen. If you want to know more about CALayer there are a few good tutorials on it here and here.
Since Metal is a different beast than a normal UIView, you need to create a special kind of CALayer: CAMetalLayer. This layer doesn’t live in the Metal framework, it lives in the QuartzCore framework, along with the special layer for rendering different flavors of OpenGL ES.
Create an CAMetalLayer property under your MTLDevice property:
var metalLayer: CAMetalLayer! = nil
Initializing the CAMetalLayer is a little more complicated than initializing the MTLDevice. There are four setable properties on the CAMetalLayer:
- Device
- Pixel Format
- Framebuffer Only
- Drawable Size
Device is self explanatory. It is simply the MTLDevice we created in our last step.
Pixel format is your chosen MTLPixelFormat. There are over a hundred items in the MTLPixelFormat struct, but there are only three options available on the CAMetalLayer: MTLPixelFormatBGRA8Unorm, MTLPixelFormatBGRA8Unorm_sRGB, and MTLPixelFormatRGBA16Float. The default pixel format is MTLPixelFormatBGRA8Unorm, so I am just going to leave it there unless I have some reason to change it.
Framebuffer only is an optimization option. There are two kinds of MTLResource types in Metal: MTLTexture and MTLBuffer. MTLTexture objects are less efficient because they need to be able to sample textures and do pixel read/write operations. If you don’t need those things you can make your code more efficient by telling the compiler this is something it never has to worry about.
Drawable size specifies how large your texture is. Since we are not currently using a texture, we don’t need to set this.
Add the following code to your viewDidLoad() method:
// Set the CAMetalLayer
metalLayer = CAMetalLayer()
metalLayer.device = device
metalLayer.pixelFormat = .BGRA8Unorm
metalLayer.framebufferOnly = true
metalLayer.frame = view.layer.frame
view.layer.addSublayer(metalLayer)
You’re initializing the metalLayer, then setting the properties on it that are relevant to this project. We’re leaving the pixel format to the default and since we don’t have any textures, we’re setting the optimization to true.
As with all layers, we’re setting the frame and adding it as a sublayer. Huzzah!
Command Queue
We will need an object that will organize the commands that we need to execute. In Metal, that object is the MTLCommandQueue. The MTLCommandQueue is our Space Weaver that keeps all of our command threads straight and running properly.
Add this property to the top of your View Controller class:
var commandQueue: MTLCommandQueue! = nil
This creates a command queue that is available to all of our methods within our View Controller. It will be used in a couple of different places and we want it to remain consistent and not go out of scope.
Up next, we need to set the command queue. Add this line of code into your viewDidLoad() function at the bottom:
// Set the Command Queue
commandQueue = device.newCommandQueue()
We’re almost done implementing all the code we need in our viewDidLoad() method. We just need to set up the functionality to actually draw to the screen. For that, we need a display link.
DisplayLink
We now have our CAMetal sublayer in place and we can draw to the screen. But how do we know when to trigger the screen to redraw?
It needs to redraw any time the screen refreshes. Since this is a common task in iOS, there is a built in class available to do this: CADisplayLink.
CADisplayLink exists to synch your drawing to the refresh rate of the display.
Add a new property to your ViewController class:
var timer: CADisplayLink! = nil
In order to set up your display link, you need to tell it what the target is and what code needs to be run every time the link is triggered. Since we are creating this for the view controller, the target is self. We just need the program to render, so I called this selector renderloop:
// Set the Timer
timer = CADisplayLink(target: self, selector: Selector("renderloop"))
timer.addToRunLoop(NSRunLoop.mainRunLoop(), forMode: NSDefaultRunLoopMode)
After you initialize the display link, you need to register it with a run loop. We are just registering it with the main run loop on the default mode to get access to coordinate the redrawing of the screen.
You have specified renderloop as your selector, but it hasn’t been created yet. Go ahead and do that now at the bottom of the class:
func render() {
  // TODO
}

func renderloop() {
  autoreleasepool {
    self.render()
  }
}
So, we didn’t just create the renderloop method, we created another one as well. The renderloop method just calls a render method encapsulated within an autoreleasepool. We’ll be setting up that render method next.
Render Pipeline
Rendering is the process where the program takes all of the information it has about the scene and compiles it together to determine the color of each pixel on the screen.
This is a rich and immersive topic that I would like to explore more fully in time, but for now I am trying to make sure I include the most basic information necessary to understand the code needed to do the minimum here.
If you would like a better explanation of what rendering is and how it works, there is a great explanation of it and the math involved in Pixar in a Box on Khan Academy.
Now that we have our display link in place, we would like to be able set up the code necessary to take a bunch of numbers and small shader programs and turn them into something cool we see on the screen.
To do that, we need to set up a rendering pipeline. A rendering pipeline takes all the inputs you have (vertices, shaders, optimizations, etc…) and coordinates them to make sure that each vertex and fragment is produced properly on the screen.
This will require us to put a number of pieces in place. I will go over each one and explain its role in the process.
Render Pass Descriptor
We are going to go into that empty render method and start to fill it out. The first thing we are going to create in that method is the render pass descriptor. The render pass descriptor is a collection of color, depth, and stencil information for your renderer. In this simple template we are not concerned with the depth or the stencil properties, so we are focusing on the color properties.
Begin filling out your render() method with the following code:
func render() {
    let renderPassDescriptor = MTLRenderPassDescriptor()
    let drawable = metalLayer.nextDrawable()
    renderPassDescriptor.colorAttachments[0].texture = drawable!.texture
    renderPassDescriptor.colorAttachments[0].loadAction = .Clear
    renderPassDescriptor.colorAttachments[0].clearColor = MTLClearColor(red: 1.0, green: 0.0, blue: 1.0, alpha: 1.0)
First off, you’re creating a MTLRenderPassDescriptor(). You will need to set up the attachments for the render pass descriptor a little later. First you need to set up a property that you will need to hook up to the render pass descriptor.
The render pass descriptor needs a source for it to render. That source is maintained by the instance of the CAMetalLayer. The CAMetalLayer has a method on it called nextDrawable(). Internally, CAMetalLayer maintains a cache of textures for displaying content. This method grabs the next one in the queue available for use.
Our render pass descriptor needs to know a few things about its color attachments: texture, load action, and clear color. Our texture is whichever texture is up next in the CAMetalLayer’s pool of drawable textures.
We have three options for our load action: Don’t Care, Load, and Clear. Don’t care allows the pixel to take on any value at the start of the rendering pass. Load maintains the previous texture. Clear specifies that a value is written to every pixel. We want to use clear here because we want to over write the color that exists currently.
Lastly, we’re setting a clear color. I have arbitrarily set it to a nice magenta color. When you finally pull the switch on this application, you’ll know this succeeds when your screen turns a lovely shade of pink.
Create the Command Buffer
Everything that we do deals with buffers. You need to send commands to a buffer in order to get them to be executed and to see something happen on your screen.
In order to send your commands to a buffer, you need to create one. Let’s do that now.
Add the following code to the bottom of your render() method:
// Create Command Buffer
let commandBuffer = commandQueue.commandBuffer()
The MTLCommandBuffer, like the MTLDevice, is a protocol. It can’t be subclassed and there is only one way to instantiate a buffer object. That is calling the commandBuffer() method on and instance of MTLCommandQueue.
Earlier in this code we made MTLCommandQueue object that was available to the entire View Controller. This is why. We needed to be able to access the same command queue instance we created when the view loaded.
Render Pipeline State
We’re going to briefly jump back to our viewDidLoad() method to add one last piece that we need to set up our rendering pipeline. We need to monitor the pipeline state.
Create a new property at the top of the class along with the others:
var metalPipeline: MTLRenderPipelineState! = nil
Our pipeline state exists to interface with our shaders. Don’t worry, we will get to those.
In order to access our shaders, we are going to need some code:
// Set the Rendering Pipeline
let defaultLibrary = device.newDefaultLibrary()
let fragmentProgram = defaultLibrary?.newFunctionWithName("basic_fragment")
let vertexProgram = defaultLibrary?.newFunctionWithName("basic_vertex")

let pipelineStateDescriptor = MTLRenderPipelineDescriptor()
pipelineStateDescriptor.vertexFunction = vertexProgram
pipelineStateDescriptor.fragmentFunction = fragmentProgram
pipelineStateDescriptor.colorAttachments[0].pixelFormat = .BGRA8Unorm

do {
    try metalPipeline = device.newRenderPipelineStateWithDescriptor(pipelineStateDescriptor)
} catch let error {
    print("Failed to create pipeline state, error (error)")
}
The first thing you will notice is that we are creating a default library.
In Metal, shaders are instances of MTLFunction objects. A Library is a collection of MTLFunction objects.
The purpose of your MTLRenderPipelineDescriptor is to look at your collection of shaders and tell the renderer which fragment and vertex shader your project is going to use.
We’re creating a new default library. After that, we are creating instances of MTLFunction objects by reaching into the default library and looking for them by name.
After we have our MTLFunction objects, we need to tell the pipeline state descriptor which vertex and fragment shaders we want to use.
Since creating a Metal Pipeline is a failable operation, we need to wrap it in a do-try-catch block.
At this point you might be wondering where those vertex and fragment shader functions came from. Good question, you’re about to generate them.
Metal Shaders
Note: I am creating both a vertex and a fragment shader even though this template has no vertex buffer. I am not sure if you need a vertex shader if there is nothing for it to shade, but it builds and this is something you would be adding later when you did have a vertex buffer. It might not be strictly necessary, but I am leaving it here anyway.
In GLSL, you need both a vertex and a fragment shader since they were two halves of the same program. If the Metal Shading Language follows the same paradigms as GLSL, then this is also the case and both a vertex and a fragment shader are necessary for every program you build.
This section is going to be disappointing. I haven’t had a chance to figure this out very well yet, so I apologize for the lack of detail about how I came up with these parts. This will be rectified later.
This is the one part of your code that is not going into the ViewController class. You get to create a new file now!
Create a new file and choose the “Metal File” template. Name it “Shaders.metal”.
The Metal Shading Language is based on C++. I am not as familiar with it as I would like, so sadly this section is going to be less in depth than I would like. I promise there will be many blog posts about this in the next few months.
You are going to create two different shaders: vertex and fragment. At this point you might be wondering how these get into your default library. The way the default library works is that it automatically includes any function that is included in a .Metal file. You could create hundreds of vertex and fragment shaders in various files and all of them would be accessible from the default library. I believe that you can create multiple libraries, but that is just one of the thinks I am going to explore more fully in the future.
This is the code for the vertex shader:
vertex float4 basic_vertex(const device packed_float3* vertex_array [[ buffer(0) ]], unsigned int vid [[ vertex_id ]]) {
    return float4(vertex_array[vid], 1.0);
}
This is the code for the fragment shader:
fragment half4 basic_fragment(){
    return half4(1.0);
}
This code comes directly from the Ray Wenderlich tutorial. I don’t know how it was generated. I don’t want to speculate about how this works because I don’t want to have something out there that I am completely wrong about, so just know this works and I will explain why in a later blog post.
Render Command Encoder
Now that we have a buffer, we need to add some commands to it.
We’ve been creating a bunch of different things that haven’t been applied anywhere yet. We’re ready to put those things to work.
Add this code to the bottom of the render() method:
// Create Render Command Encoder
let renderEncoder = commandBuffer.renderCommandEncoderWithDescriptor(renderPassDescriptor)
renderEncoder.setRenderPipelineState(metalPipeline)
renderEncoder.endEncoding()
The command encoder needs to know about the render pass and the pipeline state. We already created both of these things and went into some depth about what they do. We’re simply adding these specifications to the render encoder. After we add those to the encoder, we need to let the render encoder know we’re done by ending our encoding.
Commit the Command Buffer
Almost done! Just two more lines of code:
// Commit the Command Buffer
commandBuffer.presentDrawable(drawable!)
commandBuffer.commit()
We are taking that top drawable texture from the CAMetalLayer and queuing it up in the command buffer to be processed by the render pipeline. Finally, we are committing the command buffer.
Bring it all Together
I have placed this code in a GitHub repository.
There are a lot of aspects of this project that I am looking forward to exploring in more depth over the next few months.
The purpose of this blog post was to try and flesh out some of the code a little bit. Most of the blog posts I have seen involving this kind of template don’t really get into the nuts and bolts about what each of these things does and why you need them in your project.
It would not be useful to delve into the nitty gritty of everything in the framework. This post was long enough as it is!
I hope that this was a little more helpful if you’re like me and you wonder what things do and why you need them instead of just being satisfied with having something that works.
This post took over a month for me to write. It’s possible there are aspects of this post that are disjointed or that I forgot to include. I would appreciate being made aware of any issues by being contacted on Twitter. I would also appreciate knowing if there are any specific topics in Metal that people are interested in hearing about.
Thanks for bearing with me through this incredibly long post!
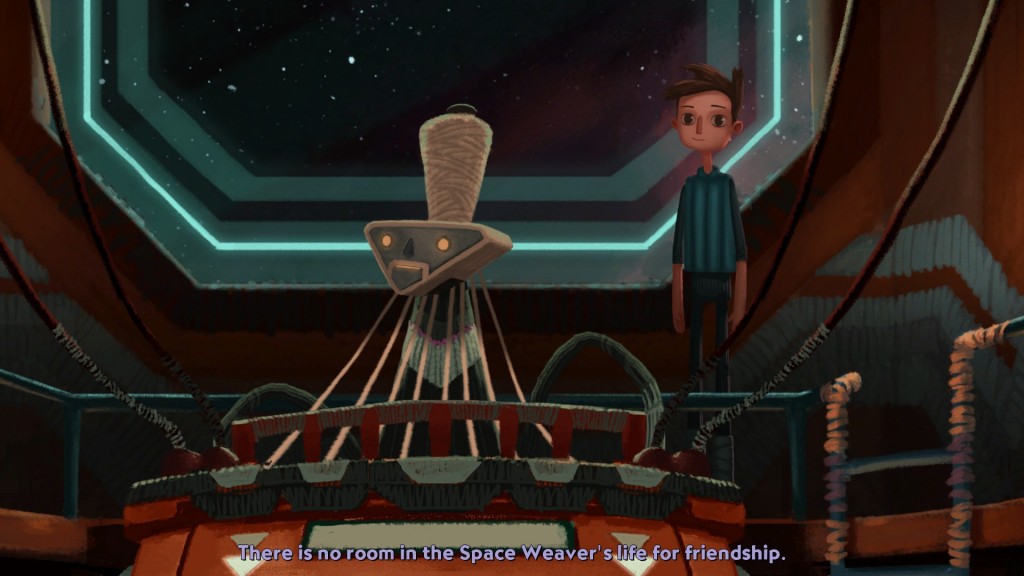
The Space Weaver is busy rendering fragments and vertices.