Last year I wrote this article about image processing shaders.
I explain how several shaders in GPUImage work and what the point of a vertex and a fragment shader are. But since this has come out, I have realized there is a lot more to this than I was able to go into in this article.
In spite of the fact that I worked for Brad Larson for a year, I never wrote a shader for GPUImage. When I started trying to figure it out, it became incredibly intimidating. There was a lot of stuff going on in the framework that I was less than familiar with. I also knew there was a lot of stuff he and I spoke about that was not really made available to the general public in the form of documentation.
So, in this blog post, I would like to extend that post somewhat by talking specifically about GPUImage rather than shaders in the abstract. I want to talk about the internal workings of GPUImage to the point that you understand what components you need to connect your shader to the rest of the framework. I want to talk about some general conventions used by Brad. Lastly, I would like to talk about how to construct complex shaders by combining several more primitive shaders.
I am sending this blog post to Brad for tech reviewing to ensure that everything in this post is factually correct and to ensure that I am not propagating any false information. If there is something I am missing here, I would appreciate having someone reach out to me to ask about it so I can include it here.
Fork GPUImage
If you want to contribute to GPUImage, you must create a fork of the repository. I am actually using this post to recreate all of my work because I didn’t fork the repo, tried to create a branch, and it was turtles all the way down.
I had a fork that was two years old and 99 commits behind the main branch. I am only using my forks to create projects to contribute to the framework, so I destroyed my old fork and created a new one. If you’re better at Git than I am and can keep pulling in the changes, then awesome. My Git-fu is weak so I did this, which is probably making a bunch of people sob and scream “WHY?!?”
Adding Your New Filter to the Framework
There are two different instances of the GPUImage framework: Mac and iOS. They both share a lot of the same code files, but you need to add the new filter to both manually.
My Solarize filter is one that modifies the color, so I dragged and dropped my filter into the group of color modifying shaders. The source files go into the Source folder in the Framework folder in the file you clone from GitHub.

Where the shader files go
While you are looking at your .h file, you need to make sure that it is set to Public rather than Project. If you don’t do that, it won’t be visible for the next step in this process.
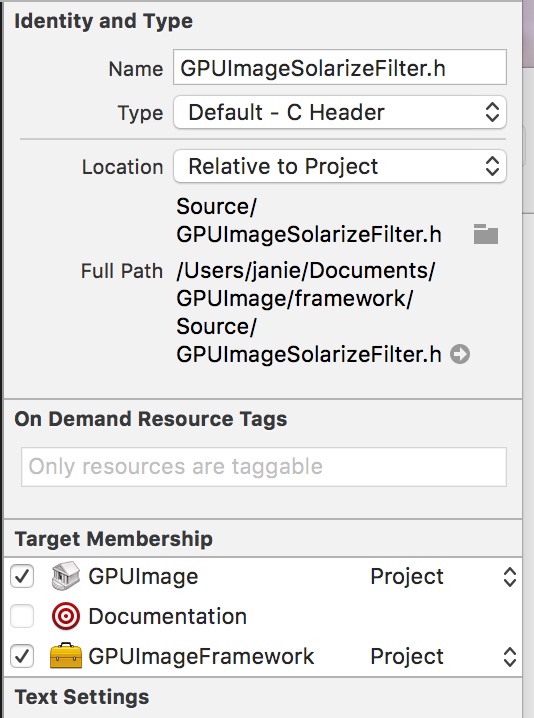
This is the wrong privacy setting for the header file.
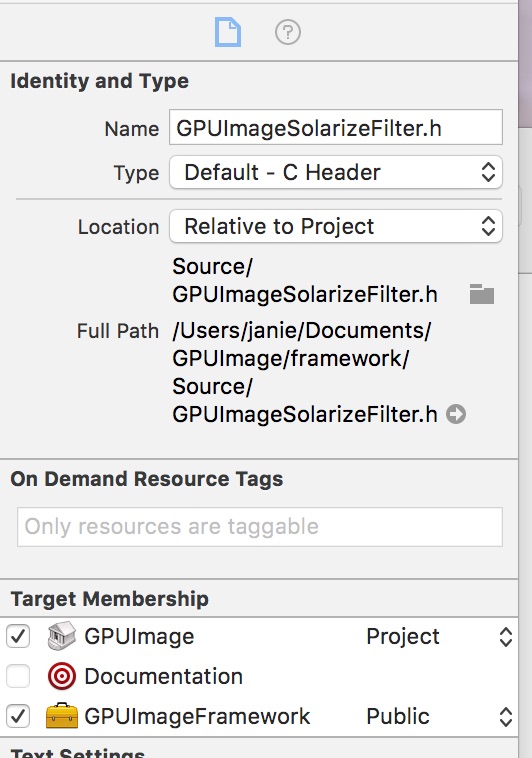
This is the correct privacy setting
Next, you need to go to the Build Phases of the GPUImageFramework target of your project. You need to add the .h file to the Headers in the framework and the .m file to the Compile Sources.
I had some trouble doing this. When I would click on the “+” button at the bottom of the filter list, I would only be able to find the opposite file. So for example, when I tried to add my header to the Headers list, I would only be able to find the solarization implementation file. The way I got around this was to drag the file from the list and drop it into the build phases target.
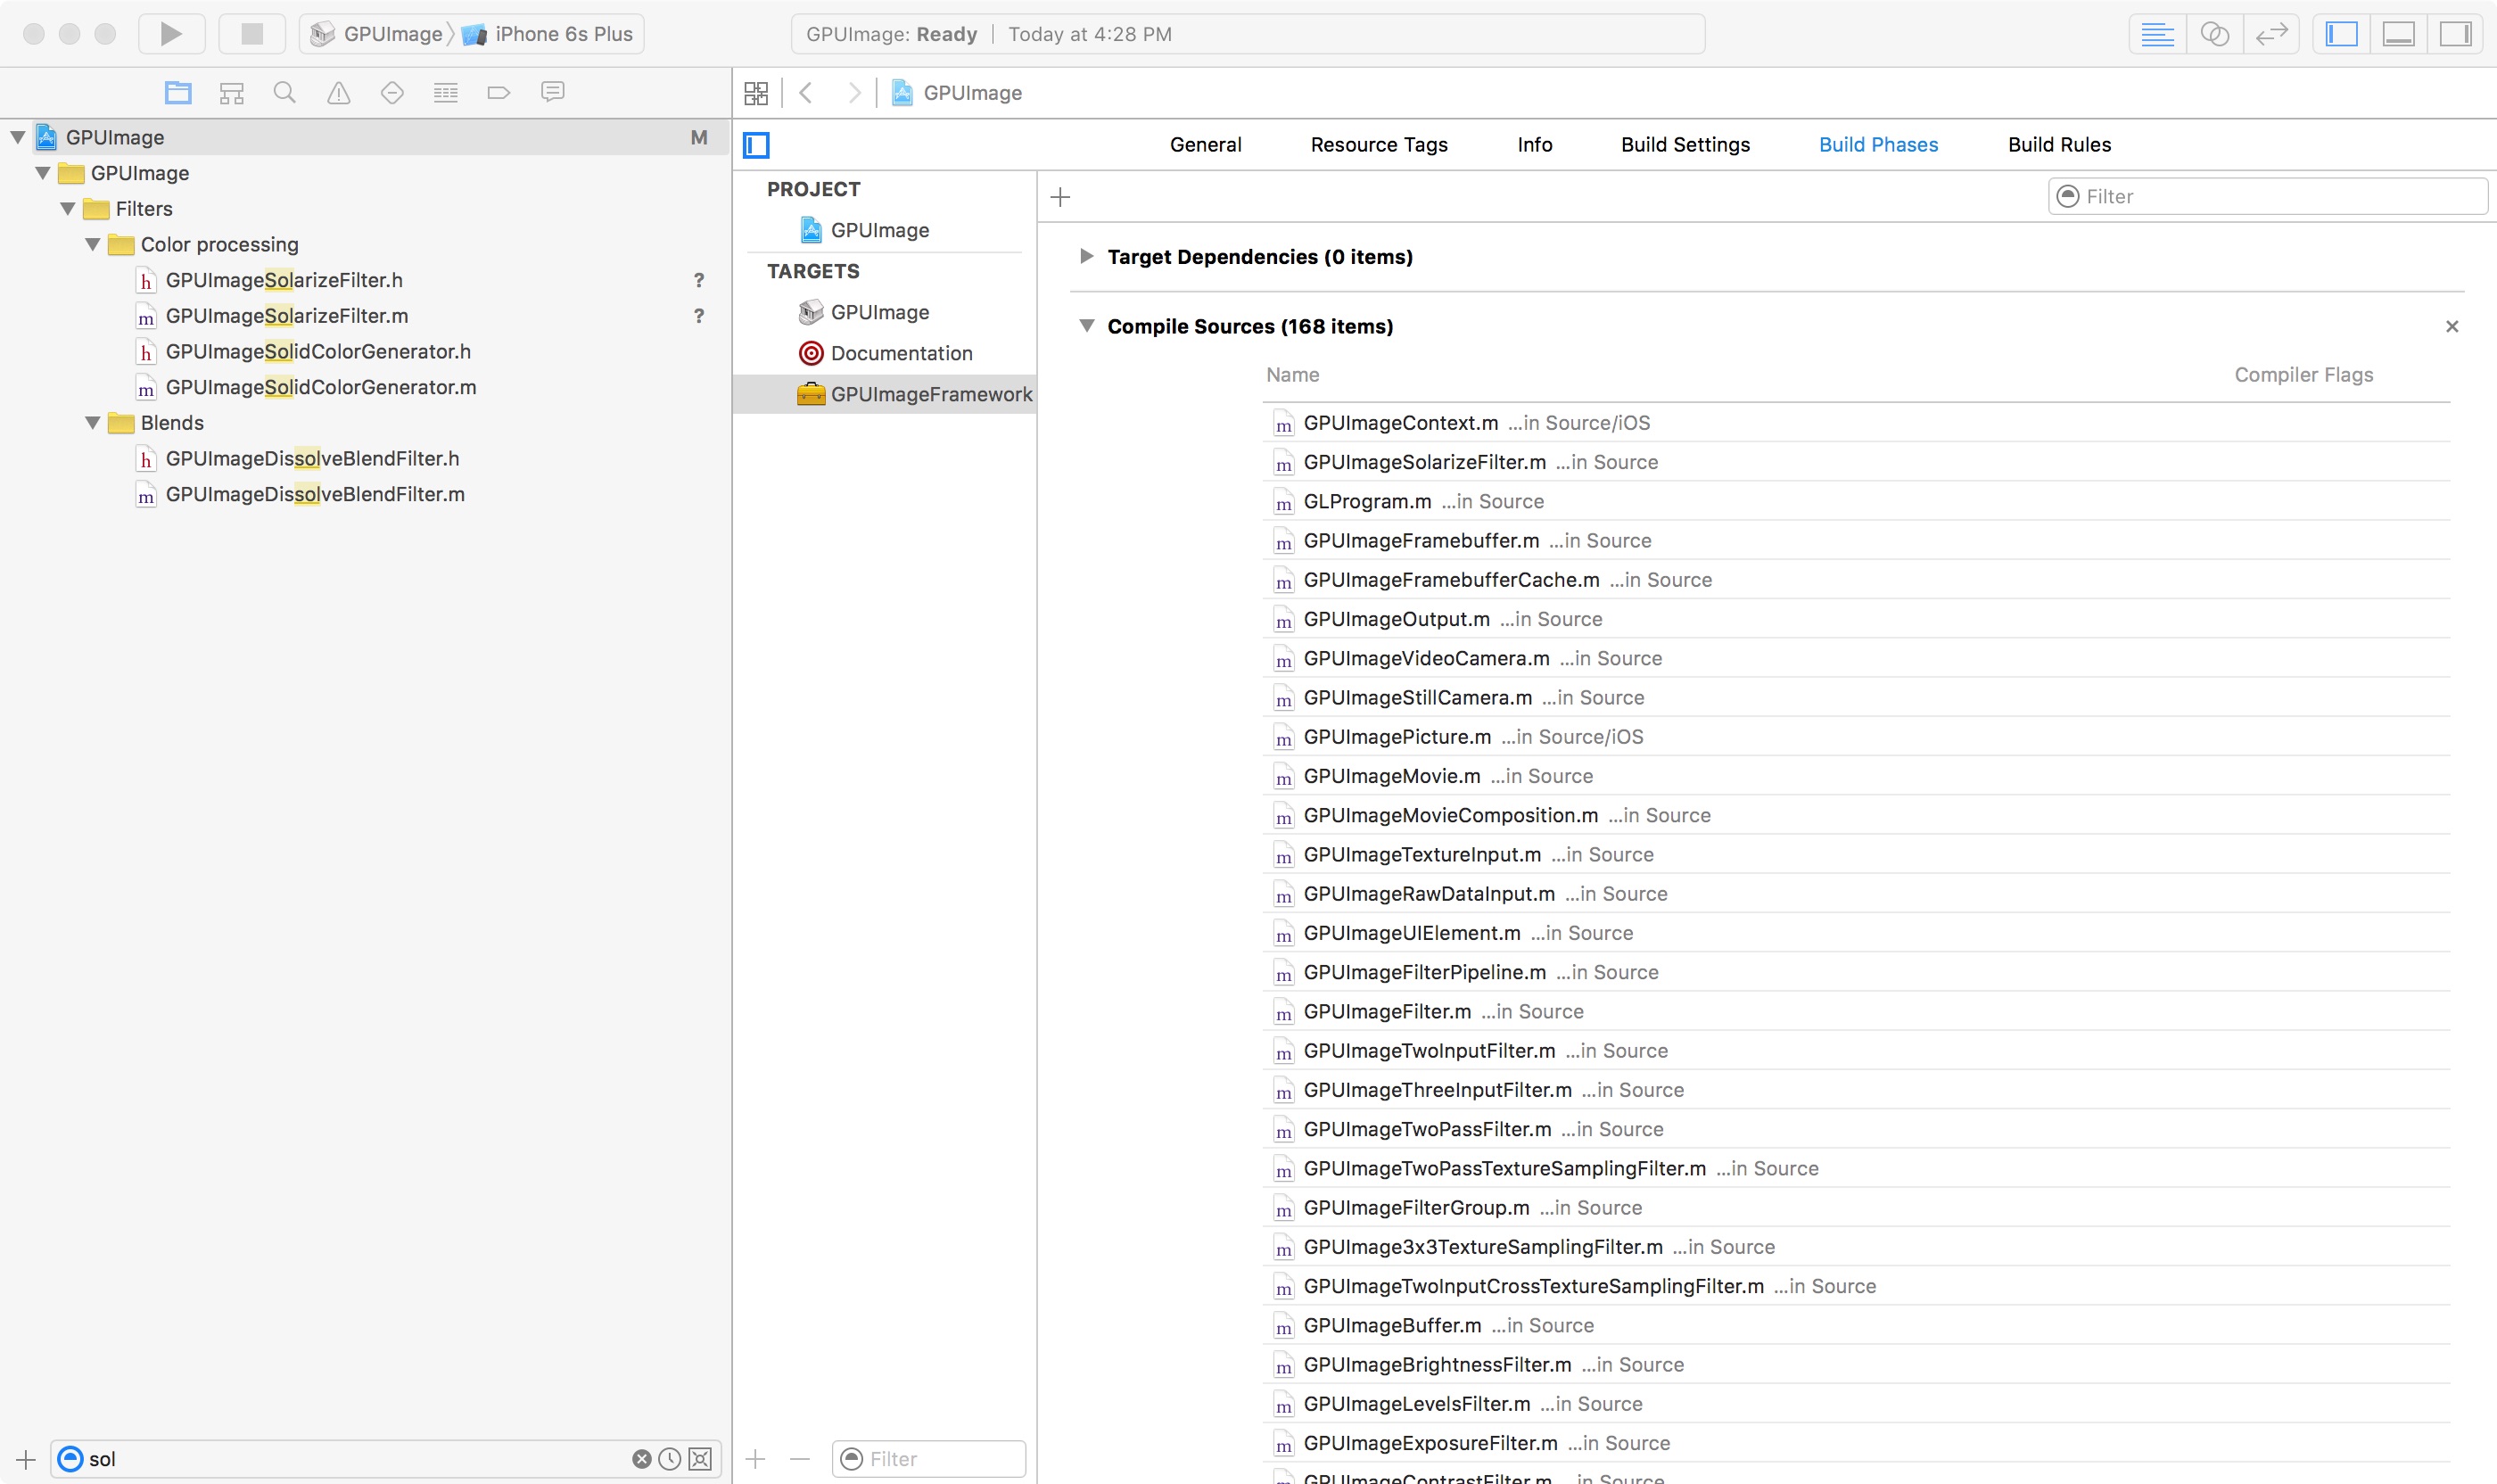
Drag the file from the left to the correct build phase on the right.
Lastly, you need to add your filter to the GPUImage.h header file so that the framework has access to your shader. (By the way, wasn’t C/Objective-C a pain??)
The GPUImage.h is different for the Mac and the iOS project, so if you want your filter to be available on both platforms, you need to remember to add it to both GPUImage.h header files.
Adding Your New Filter to the Filter Showcase
First off, want to warn you to only use the Swift version of the Filter Showcase. I had a lot of stuff that I was adding in here to try and get the Objective-C version working. That was the main reason I split this into two blog posts. It is a pain in the ass and it was made far simpler in the Swift version of the filter showcase.
When you open the Filter Showcase, you will be asked if you want to update to the recommended project settings. Don’t do this!
The only place you need to make a change is in the file FilterOperations.swift. This file is shared between both the iOS and the Mac Filter Showcase apps, so you only have to change this once. Huzzah!
You need to add your new filter to the filterOperations array. There are a few things you need to set in your initialization:
FilterOperation( listName:"Solarize", titleName:"Solarize", sliderConfiguration:.Enabled(minimumValue:0.0, maximumValue:1.0, initialValue:0.5), sliderUpdateCallback: {(filter, sliderValue) in filter.threshold = sliderValue }, filterOperationType:.SingleInput ),
I looked at the parameters used in the GPUImageLuminanceThresholdFilter initialization because my shader was primarily based on this code. As such, your filters might have different parameters than mine did. Look around at other instances to get an idea of how your filter should be initialized.
When you build and run the Filter Showcase, you might encounter an issue where the project builds but doesn’t run. You might see this pop-up:
Update the what now??
If this happens, don’t update anything. Xcode is trying to run the wrong scheme. Look up at the top of Xcode near the “Play” button and check the scheme. It should say Filter Showcase. If it says GPUImage instead, then you need to change the scheme and it should work okay.
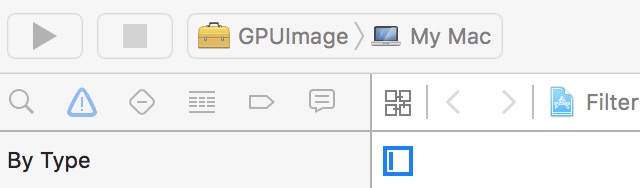
Wrong schemes are full of fail.
GPUImage Style Guide
I am going to go through my Solarize filter to make note of some style things that you should keep in mind when you are writing your own filters to try and keep things consistent.
The entire implementation file for shader is represented in this section, but I am showing a chunk at a time and explaining each part.
#import "GPUImageSolarizeFilter.h"
As with all C programs, you need to import the header for your shader in the implementation file.
#if TARGET_IPHONE_SIMULATOR || TARGET_OS_IPHONE
NSString *const kGPUImageSolarizeFragmentShaderString = SHADER_STRING
(
 varying highp vec2 textureCoordinate;

 uniform sampler2D inputImageTexture;
 uniform highp float threshold;

 const highp vec3 W = vec3(0.2125, 0.7154, 0.0721);

 void main()
 {
     highp vec4 textureColor = texture2D(inputImageTexture, textureCoordinate);
     highp float luminance = dot(textureColor.rgb, W);
     highp float thresholdResult = step(luminance, threshold);
     highp vec3 finalColor = abs(thresholdResult - textureColor.rgb);

     gl_FragColor = vec4(finalColor, textureColor.w);
 }
);
Since GPUImage is cross platform, you need to check if your shader is running on an iOS device or not. Since iOS uses OpenGL ES and not just plain OpenGL, there are a slight difference that you need to take into consideration.
Notice how a bunch of the variables are described as highp. In OpenGL ES, since you have more limited processing power, if you don’t need a lot of precision, you can optimize your code by lowering the necessary precision. You do not do this in the Mac version of the shader:
#else
NSString *const kGPUImageSolarizeFragmentShaderString = SHADER_STRING
(
 varying vec2 textureCoordinate;

 uniform sampler2D inputImageTexture;
 uniform float threshold;

 const vec3 W = vec3(0.2125, 0.7154, 0.0721);

 void main()
 {
     vec4 textureColor = texture2D(inputImageTexture, textureCoordinate);
     float luminance = dot(textureColor.rgb, W);
     float thresholdResult = step(luminance, threshold);
     vec3 finalColor = abs(thresholdResult - textureColor.rgb);

     gl_FragColor = vec4(vec3(finalColor), textureColor.w);
 }
);
#endif
One last thing I want to point out is the use of NSString *const kGPUImageSolarizeFragmentShaderString = SHADER_STRING. It is a convention to take the name of your shader, add a “k” at the beginning (“k” for “constant”, get it?), and follow it with “FragmentShaderString.” Use this convention when you write your own shaders.
In each shader that you create for GPUImage you need to remember to include the textureCoordinate and the <>. These two variables receive the exact pixel you are going to process, so make sure you have those in each of your shaders.
Now we move on to the implementation:
@implementation GPUImageSolarizeFilter;

@synthesize threshold = _threshold;
I have a public facing variable, threshold, that I need to get access to in order to implement the shader, so it needs to be synthesized. Again, this is a throw back from C/Objective-C that you might not be familiar with if you just started with Swift.
#pragma mark -
#pragma mark Initialization

- (id)init;
{
    if (!(self = [super initWithFragmentShaderFromString:kGPUImageSolarizeFragmentShaderString]))
    {
        return nil;
    }

    thresholdUniform = [filterProgram uniformIndex:@"threshold"];
    self.threshold = 0.5;

    return self;
}
All Vertex shaders will look similar to this. They all have an initializer that attempts to initialize the fragment shader from that string you created back at the beginning of the if/else statements.
If you have a public facing variable like threshold is here, you need to set that up before you finish your initialization.
#pragma mark -
#pragma mark Accessors

- (void)setThreshold:(CGFloat)newValue;
{
    _threshold = newValue;

    [self setFloat:_threshold forUniform:thresholdUniform program:filterProgram];
}


@end
Lastly, if you have a public facing variable, like we do with the threshold, you need an accessor for it.
Copy/Paste Coding
I normally really do not condone “Copy/Paste” coding, but did want to mention that there is a lot of repetitive stuff in all of the shader programs. This shader only has like five lines of code that I changed between the Solarize filter and the Luminance Threshold filter.
Generally speaking, copying and pasting code is bad, but looking through a piece of code and figuring out what everything does while you are learning and being able to process how to do this on your own in the future isn’t always the worst thing in the world. I could have written my shader without having an understanding of how the two contributing filters worked.
So, use these as learning materials and there’s nothing wrong with looking at how they’re put together until you feel comfortable with the process on your own.
Wrapping Up
I know that trying to start something unfamiliar can be really intimidating. Especially if there are a bunch of esoteric steps that you’ve never done before and you don’t want to have to ask about it because you feel stupid.
I went back and forth with Brad a dozen times while writing this blog post and none of my questions were about the actual shader code. It was all about how to add this to the framework, why my shader wasn’t showing up in the header, etc…
This stuff is not intuitive if you haven’t done it before. This might be familiar to older Mac programmers who had to do this stuff all the time, but if you primarily work with Swift where everything is just there and you don’t have to add things to build phases, then this can be extraordinarily frustrating.
I hope that this is helpful to those who have wanted to contribute to GPUImage but got frustrated by the hoops that were necessary to jump through to get something working. I hope that this means that people have a resource besides Brad to get answers to common questions that aren’t really available on Stack Overflow.